Home » Rain Garden Design Ideas and Benefits

Rain Garden Design Ideas and Benefits
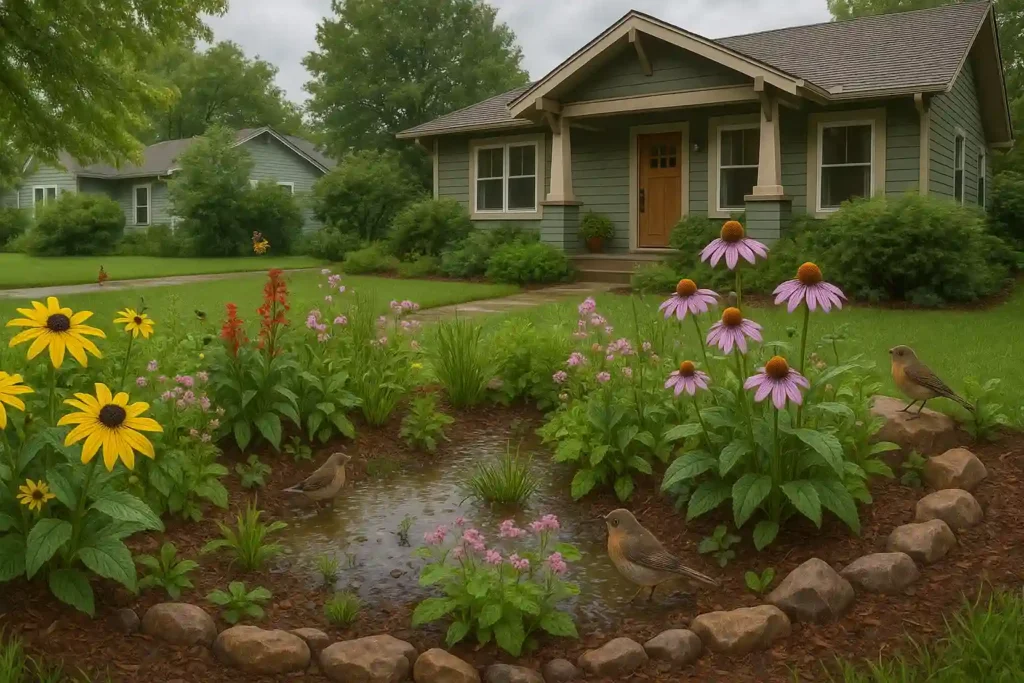
Rain Garden Design Ideas and Benefits is an article to help you understand more about how to create a rain garden and reap its benefits. First, rain gardens are designed to catch, soak in, and filter rainwater, minimizing stormwater overflow. Specifically, they are designed as shallow basins for plantation, which decrease water flow. This, in turn, facilitates the diminishing of erosion and also the protection of water tracts. Moreover, its design helps to trap pollutants like oils, fertilizers, and sediments that flow into natural water bodies or storm drains. Additionally, rain gardens give a fillip to the visual beauty of your landscape throughout the year. Being pocket-and-environment-friendly, they contribute to the well-being of our planet by welcoming helpful insects, birds, and pollinators.
Furthermore, rain gardens are simple to design and create with tools at hand and foundational gardening wisdom. Therefore, in this article, let us learn how to choose the right location and plants. Finally, let us also get to know the digging, planting, and maintenance process.Why Build a Rain Garden?
- Reduce stormwater runoff and flooding
- Filter out pollutants like oil and fertilizer
- Recharge groundwater
- Create wildlife habitats for birds and pollinators
- Add aesthetic value and curb appeal
- Are low-maintenance and inexpensive to install
Basic Rain Garden Design & Layout Planning
Where to Place It
Choose a low spot at least 10 feet from buildings. Ideal areas include:
- Near downspouts
- Places where water naturally pools
- Gentle slopes (not steep hills)
Shape & Size
Use natural, curvy shapes like kidney beans or teardrops. Size it based on the area draining into it (typically 10–30% of that area). Include:
- A berm on the downhill side to hold water
- A level bottom for even water spread
- An overflow outlet (gravel trench or pipe) to handle heavy rain
Eco-Friendly, Budget Ideas
- Firstly, reuse materials: old bricks, rocks, logs, and salvaged wood.
- Additionally, mulch: use free wood chips or compost.
- Also, DIY inflow systems: PVC pipes or shallow swales to direct water.
- Moreover, rain barrels: collect overflow water for later use.
- Furthermore, plant swaps: source native plants from local events or neighbors.
- Finally, tools: only shovels and wheelbarrows are usually needed—no heavy machinery.
Soil Prep & Installation for Rain Garden
Soil Mix
Rain gardens need loose, fast-draining soil. Mix:
- 50–60% coarse sand
- 20–30% compost
- 20–30% topsoil
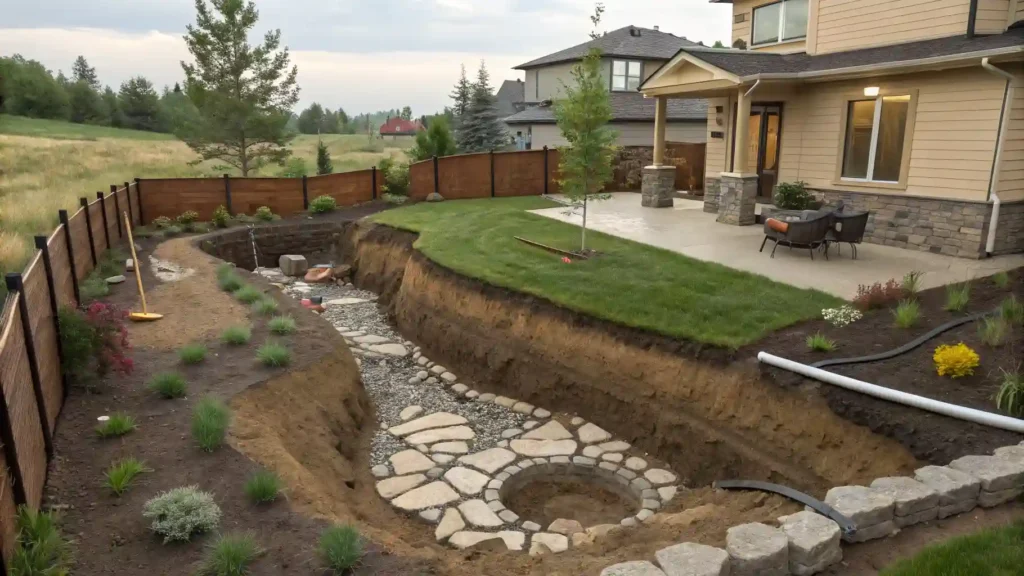
Step-by-Step Installation
- First, pick location and test drainage
- Next, excavate to form a basin
- Then, mix and return soil for proper infiltration
- After that, build berms to contain water
- Subsequently, plant in zones based on water tolerance
- Meanwhile, install inflow/outflow piping or swales
- Finally, mulch and finish with decorative edges or stone
Plant Selection for Rain Garden
Planting Zones
- Bottom (wettest): Blue flag iris, swamp milkweed, sedges, cardinal flower
- Middle (moist): Coneflower, Joe-Pye weed, bee balm, asters, switchgrass
- Edges (drier): Black-eyed Susan, goldenrod, dogwood, buttonbush
- Groundcover: Violets, wild geraniums, low-growing sedges
Water Management Tips
- No irrigation needed after year one—plants adapt to natural rain cycles.
- Rain capture: Use pipes or troughs to direct roof runoff.
- Overflow protection: Add gravel notches, dry creek beds, or buried pipes.
- Drainage check: If pooling lasts >48 hours, improve the soil or outlet.
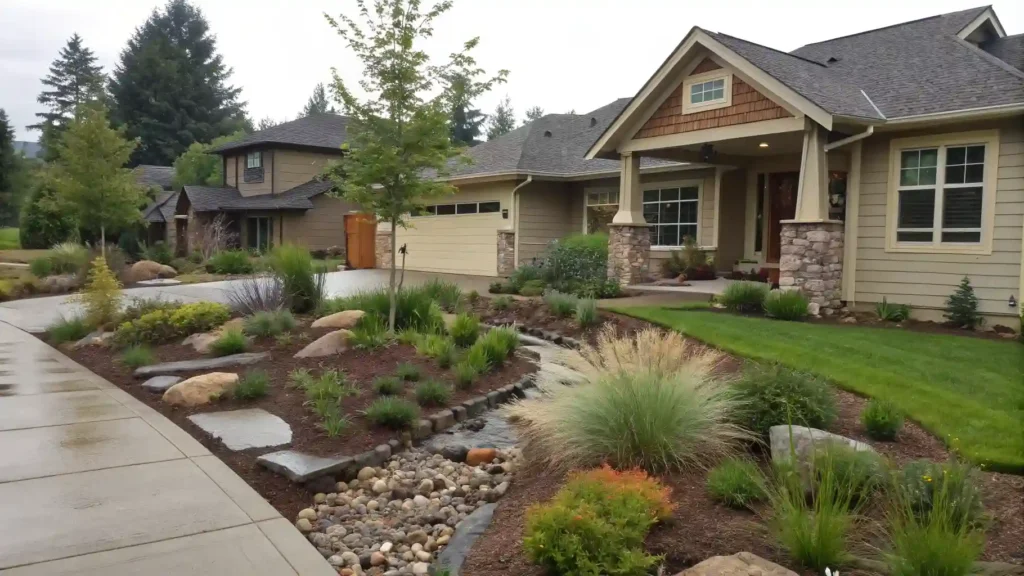
Make It Beautiful
- To begin with, use mulch and stone borders to frame the garden.
- Next, plant for seasonal color: spring iris, summer coneflowers, and fall asters.
- Additionally, use textured grasses and seed heads for winter interest.
- For added charm, add stepping stones, benches, or garden art for character.
- Finally, consider a dry creek bed to visually guide rainwater.
Rain Garden Maintenance Guide
Year 1
- Water during dry spells
- Weed regularly
- Keep mulch fresh (2–3 inches)
Ongoing Care
- Inspect after storms for debris or erosion
- Clear overflow channels if blocked
- Prune or divide plants annually if overgrown
- Refresh compost or mulch as needed
Seasonal Tips
- Spring: Cut back dead growth, add mulch
- Summer: Spot water during droughts
- Fall: Trim plants, clean debris
- Winter: Let seedheads remain for wildlife interest
Summary
Ever thought your garden could be a superhero? A vibrant world in your backyard, buzzing with life and purpose. It is not just a patch of plants. A rain garden is a smart living natural mechanism that catches and soaks up rainwater runoff from your roof, driveway, and lawn. It halts soil from getting washed away, and also cleans water by filtering out pollutants from it.
Beneficial insects and birds gravitate towards this haven created exclusively for them. Whether you are a green-planet-dreamer or just piqued with drainage issues, go for a rain garden. Vibrant beauty is guaranteed in this exercise. Form and function lived happily ever after!FAQs
1. What is a Rain Garden?
2. How do I design and create a Rain Garden?
- To start, location: at least 10 feet from buildings, in a low-lying area.
- Then, soil test: ensure drainage within 24–48 hours; amend soil if needed.
- Next, dig: create a basin 4–8 inches deep.
- Afterwards, add soil mix: blend sand, compost, and topsoil.
- Following that, plant: use native, deep-rooted species.
- Lastly, mulch & water: mulch to retain moisture and suppress weeds; water until established.
3. What’s the best shape for a Rain Garden?
4. What goes at the bottom of the Rain Garden?
5. Are there any disadvantages to creating a Rain Garden?
- Labor and setup costs
- Ongoing maintenance
- Space needs
- Poor infiltration in heavy clay soils

