Vermicompost | ytvblog

How to Make Vermicompost at Home

Observing and experiencing the voyage with plants growing can be spiritually rewarding. It turns out to be a spiritual journey for you and your family. Additionally, creating vermicompost is a simple process as it transforms everyday kitchen scraps into liquid gold. In this article, we explain every step you need to follow. Furthermore, this article is crafted for homemakers seeking eco-friendly ideas. Consequently, you can start small and watch your garden flourish.

Vermicomposting is not only practical but fun too. Specifically, imagine turning your waste into a garden treasure. Likewise, it is like nature’s own recycling program. Hence, every scrap finds a new purpose in your soil. Ultimately, you become part of a green revolution at home.

Vermicompost- What is it?

Earthworms work in tandem to produce this exceptional organic matter called Vermicompost. Additionally, these worms digest food waste and convert it naturally. Consequently, the result is a dark, crumbly soil enhancer. Furthermore, this organic fertilizer is packed with nutrients. Therefore, the soil structure gets a boost, and plant growth is healthy. Likewise, the process is natural and chemical-free. Specifically, it mimics what happens in nature when leaves decompose. Ultimately, you get a product that nourishes your garden without extra chemicals.

Think of vermicompost as nature’s superfood

It enriches soil just like vitamins boost our health. Meanwhile, the worms do the hard work so that you can enjoy the benefits. In fact, every home can benefit from this sustainable practice.

All credit for this video goes to Let’stute. This video explains vermicomposting, including its definition and methods. Learn how organic waste matter is broken down by microorganisms through this sustainable composting technique!

Video Credit: Let’stute

All credit for this video goes to Let’stute. This video explains vermicomposting, including its definition and methods. Learn how organic waste matter is broken down by microorganisms through this sustainable composting technique!

Benefits of Vermicomposting

Using vermicompost is beneficial in many ways. To begin with, it helps reduce the waste that goes to landfills. In turn, this process supports a healthier environment. Moreover, you also provide a natural fertilizer for your garden.

Environmental Benefits

Landfills generate toxic gases and vitiate the air. Using organic waste at home for your vermicompost set-up automatically reduces landfill waste. Home composting also prevents these harmful emissions. In the long run, these baby steps can make a profound difference to help the environment. Remember, a new life will emerge as compost from each tiny scrap of waste. It is the first vital little step your house takes in keeping emissions of greenhouse gas at bay. This way, the method supports cleaner air and a better climate. Clearly, it is a win-win for you and the planet.
Vermicompost | ytvblog

A Healthy Boost to Plants

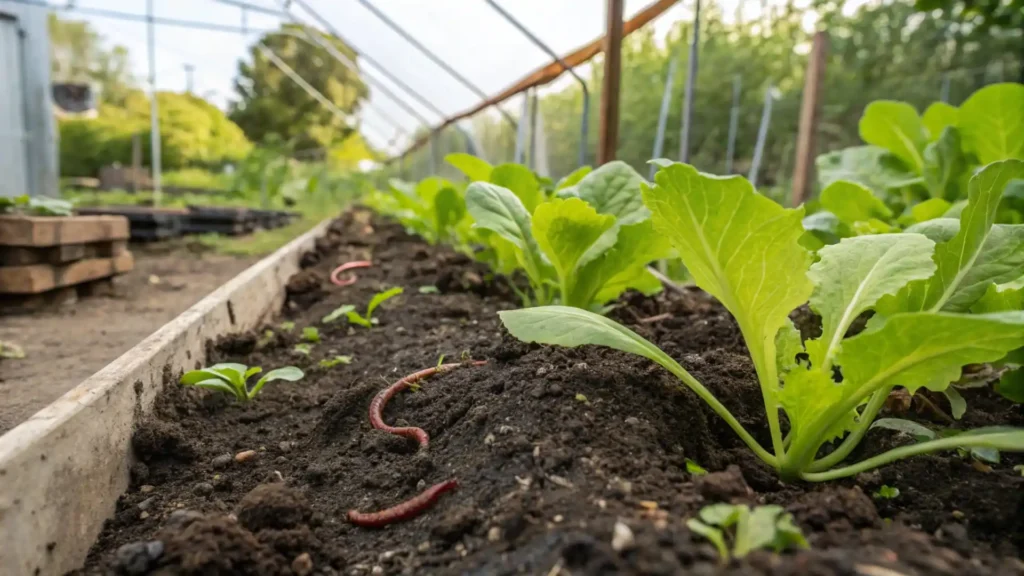
Important nutrients necessary for a plant’s overall growth are found in Vermicompost. It is filled with vital minerals and vitamins to successfully aid plants in growing and thriving robustly. Vermicompost retains water in the soil, and this quality makes plants resilient and hardy to grow in myriad conditions.

In addition, it produces helpful microorganisms that protect plants from many diseases. A thriving, living, vibrant ecosystem is created by YOU!
Vermicompost | ytvblog

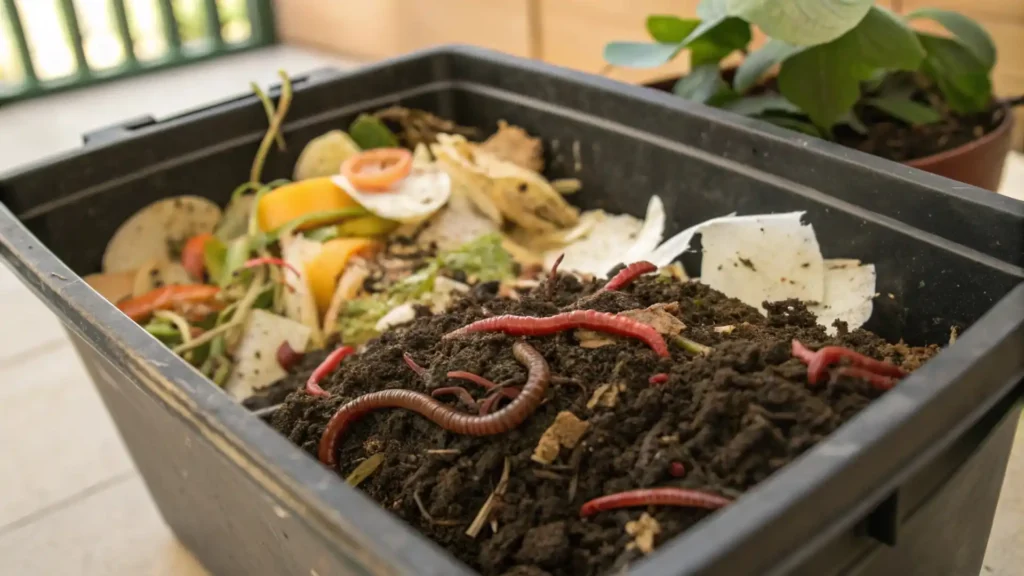
Vermicomposting- How to Start?

Vermicomposting is easy and simple to start. First, it requires a few basic steps and careful attention. Next, you only need simple materials from your kitchen and home. Therefore, even a beginner can set up a successful system.

Who Should Consider Vermicomposting?

Have kitchen scraps, start vermicomposting. It is advisable to adhere to sustainable practices. A modest setup on your balcony can set the ball rolling. It is the best practice for householders who are keen on reducing waste. A fine endeavour for families with an eco-conscious state of mind.

Vermicomposting- Is it Ideal for Your Home?

Vermicomposting fits like a glove in small spaces. A modest plastic bin or a wooden box can do the magic. A large yard or garden is not needed to set up the process. Moreover, the process is simple and manageable. In this way, your home becomes a center for sustainability. Plus, it even saves money on commercial fertilizers.

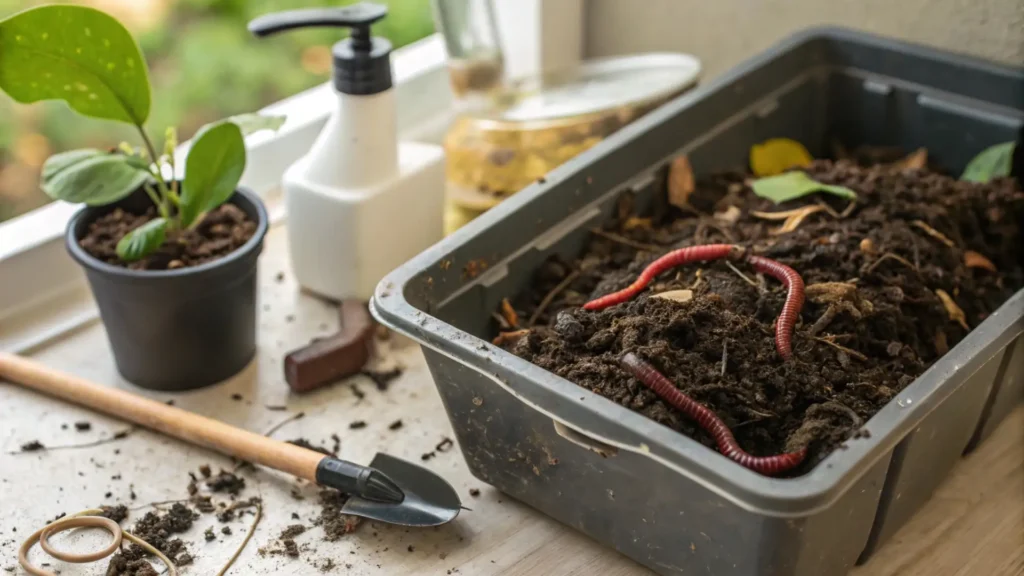
Materials You Need for a Vermicompost Setup

Choosing and collecting the ideal materials is the key. A container, bedding, worms, and food waste are the salient features. Budget-friendly and easily accessible, these materials are easily found. Therefore, gather all items before starting your project.

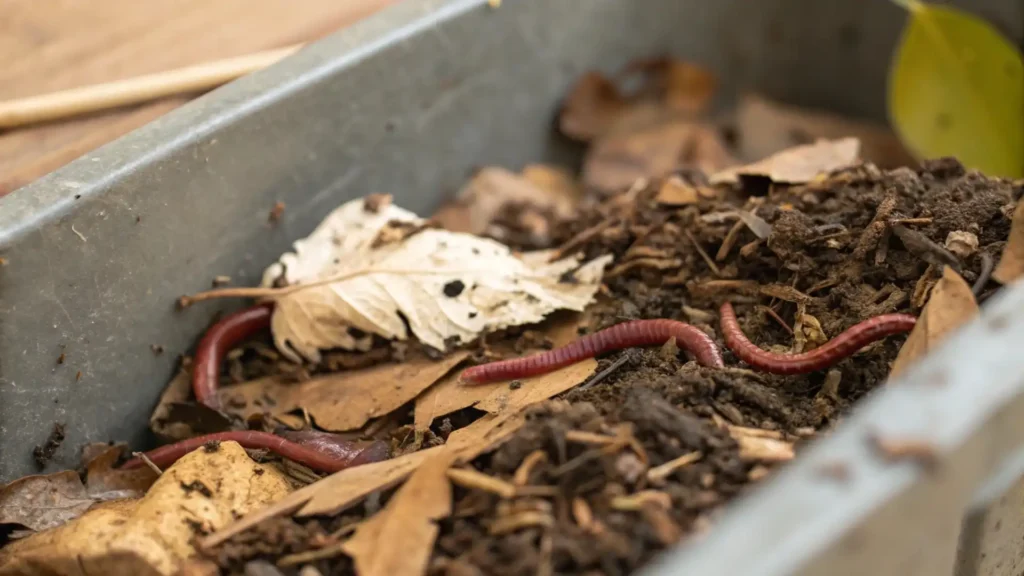
Ideal Worms for Composting

Red wigglers are the top choice for composting because they are efficient at breaking down organic matter. Moreover, you can purchase them online or from a garden store. Notably, these worms are robust and adapt well to confined spaces. In fact, they work faster than many other species, ensuring your vermicompost will be rich and nutritious.

The Right Choice of Tools and Equipment

A well-ventilated container is the first step. A secure lid and drainage holes in the container area are a must. To form the bedding for worms, collect shredded paper, cardboard, or dried leaves. Additionally, keep a small spade for stirring. For moisture control, a spray bottle comes in handy. Collectively, these necessary tools and materials ensure smooth operation.
Vermicompost | ytvblog

Step-by-Step Guide to Setting Up Your Vermicompost

Take a tour of the guidelines below with sincerity, and voila, you are ready on your vermicomposting voyage!

Selecting a Container

Your container is crucial to the success of your system. Before choosing, consider your space and requirements. Generally, a wooden box or plastic bin is the ideal choice. The container should be durable and easy to clean. Nonetheless, do make sure there are holes for air circulation and water drainage.
Vermicompost | ytvblog

Containers- The Ideal Types

Cost-effective and easily found, plastic bins are popular choices. Easy to modify and light in weight, they are ideal. To lend a natural vibe to your space, wooden boxes can also be employed. Both these types work well and are beneficial; therefore, select whichever gels with your home décor and space.
Vermicompost | ytvblog

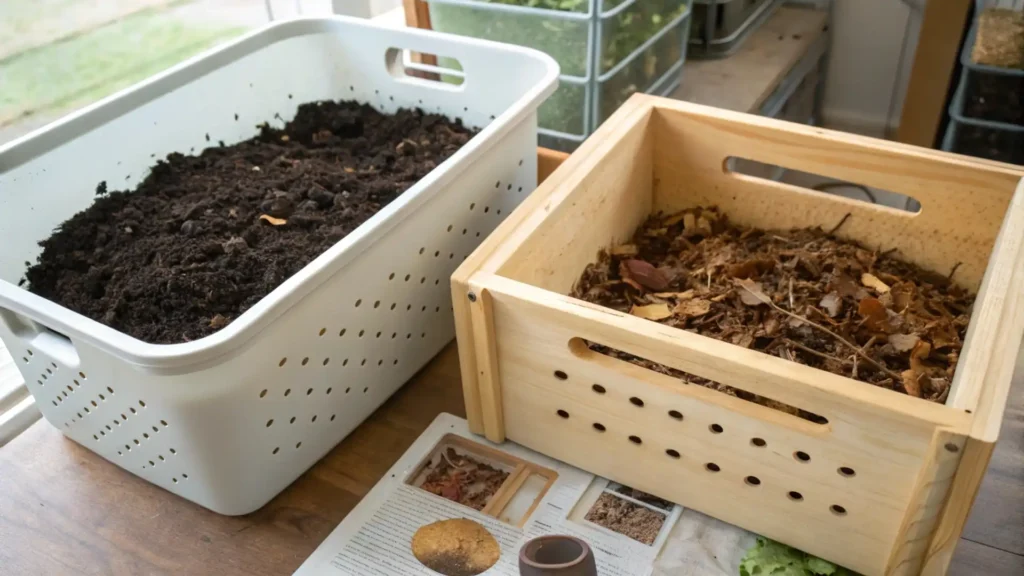
Preparing the Bedding

A cosy home for your worms is achieved by proper bedding. Shredded paper, cardboard, or dried leaves are generally used for bedding. While preparing the bedding, moisten the materials used to maintain a moisture-filled environment. Try to balance the moisture level with care. Do not make tit too dry or wet. This bedding will shelter the worms and provide food for them.
Gardening | ytvblog

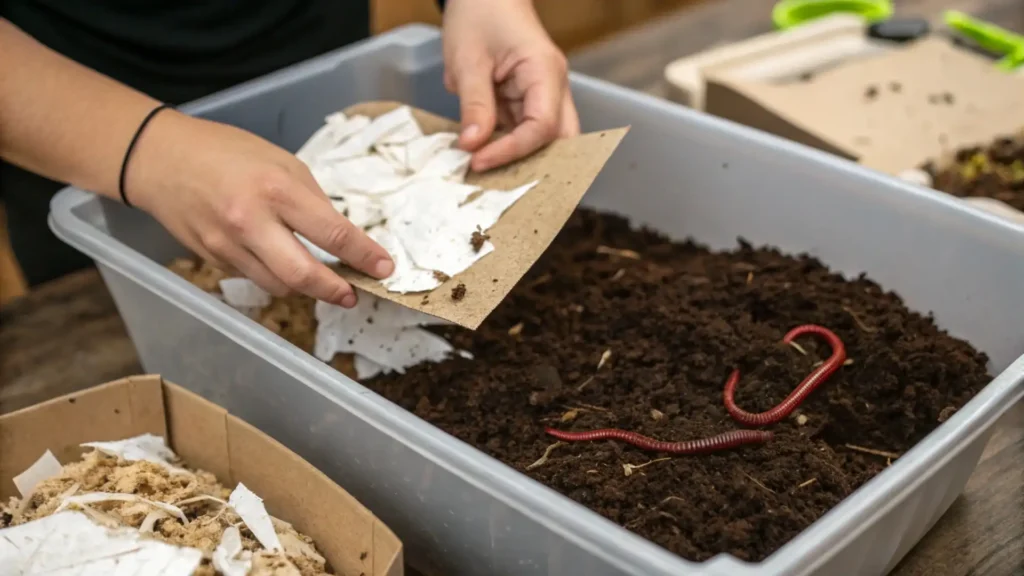
Why Vermicompost Bedding Matters

The moisture-filled environment of the bedding provides the worms with a sense of safety. In fact, it is like a soft mattress for worms to grow and multiply happily, keeping them ever active. Thus, this forms the base for a thriving vermicompost system.
Gardening | ytvblog

Adding the Worms and Food Waste

Once you are sure that your bedding is ready, carefully introduce the worms to the bedding. Then, wait for them to settle into their new environment, and only after that add food scraps. Indeed, gradual introduction of food scraps is the right way to avoid overwhelming them. Moreover, chopping the scraps into tiny pieces will help them with their digestion. Importantly, never add meat, dairy, and oily foods to the mix. Finally, keep adding a little food every few days for ideal-paced composting.
Gardening | ytvblog

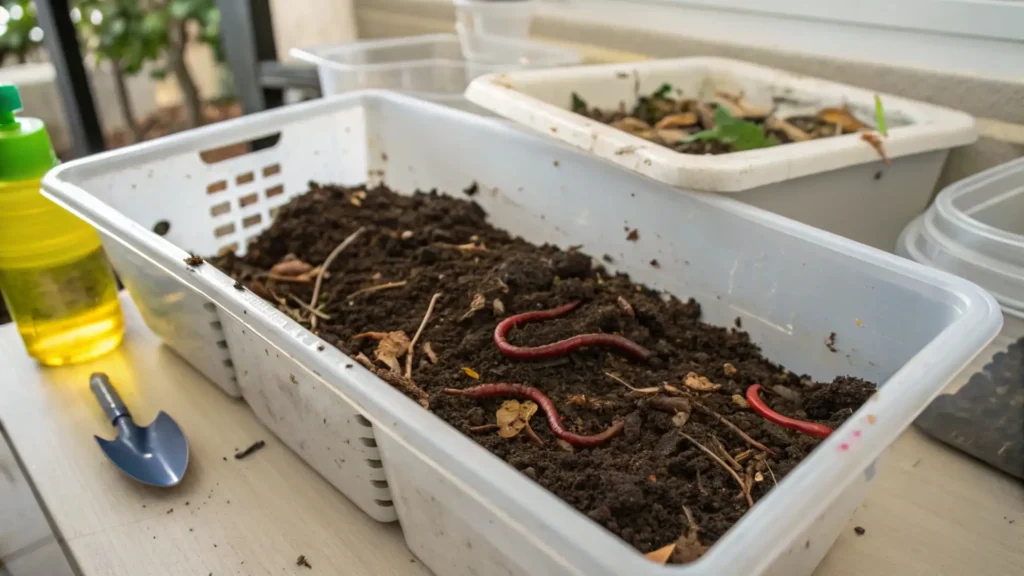
Maintaining Your Vermicompost

Consistent care is important for productive vermicomposting. Fortunately, it just needs a few daily checks. In fact, your vigil and care will help maintain the balance of the system and guard it from any issues.

Daily Care and Maintenance

Daily, keep an eye on the moisture level of the bedding. Spray water if needed. The bedding should be damp but not dripping wet. Plus, the contents should be gently stirred once a week to distribute food and moisture evenly. These tiny efforts will keep the system balanced and alive.

Troubleshooting Vermicompost Issues

It is natural that some issues may crop up in your system. Excess moisture can cause a foul odor. In that case, reduce the water if you notice a bad smell. On the flip side, very dry bedding may encourage worms to escape. Add more bedding materials if needed to balance the moisture. Overall, these simple steps help solve common issues quickly.

Video Credit: Epic Gardening

All credit for this video goes to Epic Gardening. This video reveals the #1 mistake people make with vermicomposting and how to avoid it. Watch to improve your composting game!

Harvesting Your Vermicompost

Harvesting is the day you have been waiting for! Indeed, it is the satisfying, rewarding part of vermicomposting. Now, nutrient-rich compost for your garden and plants is ready. Clearly, this phase marks the success of your efforts.

When to Harvest

Harvest when most of the food waste is decomposed. Typically, this takes a few months. Ideally, the compost should be dark and crumbly in texture. Watch for signs of thorough decomposition in your container. Once you see these signs, it is time to harvest.

Separating Worms from Compost

It is not very complicated. The first step is to push the contents with gentle care to one side of the container. Next, place a light near the open side, as the light will cause the worms to shift away. Then, scoop the dark, rich compost out carefully. Finally, return the worms to the container with fresh bedding.

Tips for Maximizing Your Vermicompost Output

A few tricks and tips can boost your vermicompost production. First, the most vital part is to maintain a balance as the mantra to feeding the worms. Moreover, avoid overloading the system with too much waste. Ideally, keep a ratio of roughly one part food to two parts bedding. Additionally, to maintain moisture balance, regularly rotate the bedding. As a result, compost will form faster in ideal conditions, consistently supplying rich nutrients to the green life in your garden.

A Healthier Garden with an Eco-Friendly Philosophy

Vermicomposting goes hand-in-hand with an eco-friendly lifestyle. You are enriching your garden soil naturally with vermicompost. Indoor plants benefit from compost mixed with the soil they grow in. In addition, your veggie garden also avails the magic power of this nutrient-rich natural matter. The drastic reduction of chemically laced fertilizers is the biggest bonus. Ultimately, nature recycles your waste to create a sustainable oasis for you to celebrate.
Gardening | ytvblog
Step What to Do Tips
1. Setup Firstly, get a bin, add bedding, and place worms in it. Make sure the bin has holes for air circulation.
2. Add Food Then, feed worms veggie and fruit scraps. Chop food scraps to make it easier for worms to digest.
3. Maintain Afterward, keep bedding moist and stir it occasionally. Check moisture levels regularly to avoid over-watering.
4. Harvest Subsequently, when it’s dark and crumbly, harvest the compost. Harvest when most of the food waste is decomposed.
5. Use Finally, spread the compost on your plants or garden. Use compost within a few months for best results.

Summary

First, experiment with your setup and observe how worms transform waste efficiently. If challenges arise, adjust the balance gradually. Meanwhile, vermicomposting holds your hands invisibly as you embark on a spiritual and creative voyage to connect with nature. Moreover, it not only enriches the soil but also retains water to provide plants a holistic boost to grow healthily. Thus, eco-friendly gardening is encouraged, and waste is reduced, making it a simple and rewarding way of life.
“Vermicomposting transforms waste into life, nourishing the earth and our gardens with nature’s own wisdom.”

FAQs

1. Can I embark on vermicomposting without a garden at home?

Absolutely! Vermicomposting is ideal for starting indoors. A small container and a cool spot are sufficient.

2. Which kind of kitchen scraps are ideal for vermicomposting?

The idea scraps to be employed are vegetable peels and fruit scraps. Meat, dairy, and oily components should be avoided at all costs.

3. How often should I add food to my system?

Add small amounts every few days. This prevents overfeeding and keeps worms happy.

4. What is the way to know that the bedding is too wet?

Foul odor from the bin is a red flag, meaning excessive moisture. A balanced, damp bedding is ideal, it should never be soaking wet.

5. Can all kinds of plants grow in a vermicompost mix?

Absolutely! It is suitable for all kinds of plants, as the main reason is that it enriches all kinds of soil.

Trending Post

Scroll to Top
Grizzo

Hi, I am Grizzo! Your Home Decor & Gardening Partner.

May I help you? 🌱